
How do I connect to the BB-400 using SSH Keys?
Connecting securely without a password to BB-400 over SSH on Windows, Mac OSX and Linux
As a follow up to the previous article on 'connecting to SSH using a username, hostname and password', this article will cover connecting over SSH using SSH Keys.
SSH keys are a public key with a matching private key. The private key is stored on the computer from which the connection originates, (i.e. your computer, the client) and the matching public key is stored on one or more BB-400s (the servers) which are to be connected to. When a connection is initialised, an encrypted channel is established over which the client proves to the server its identity using the private key to encode information, which the server can decode with the public key.
This mechanism is much more secure than SSH with a password, as public and private keys are extremely difficult to guess compared to user-generated passwords. It is also more convenient than using a password, as the SSH client will automatically use the private key to login to a server, rather than request a password on each login.
Before using any method detailed below you will need to know 3 pieces of information about the BB-400:
- Host name: by default
bb400-aaaawhere aaaa are the last 4 characters of the MAC address - User name: by default
bb - Password: by default
aaaawhere aaaa are the same last 4 characters of the MAC address. This will only be required once. On Windows a graphical user interface (GUI) will be used to demonstrate SSH with SSH keys. On Mac OSX and Linux the terminal will be used.
 Connecting to BB-400 using SSH Keys on Windows
- Download WinSCP from the official website: https://winscp.net/eng/download.php, and follow the installation steps.
- Download the Windows Installer version of PuTTY from the official website: https://www.chiark.greenend.org.uk/~sgtatham/putty/latest.html, and follow the installation steps.
Setup SSH keys in Windows
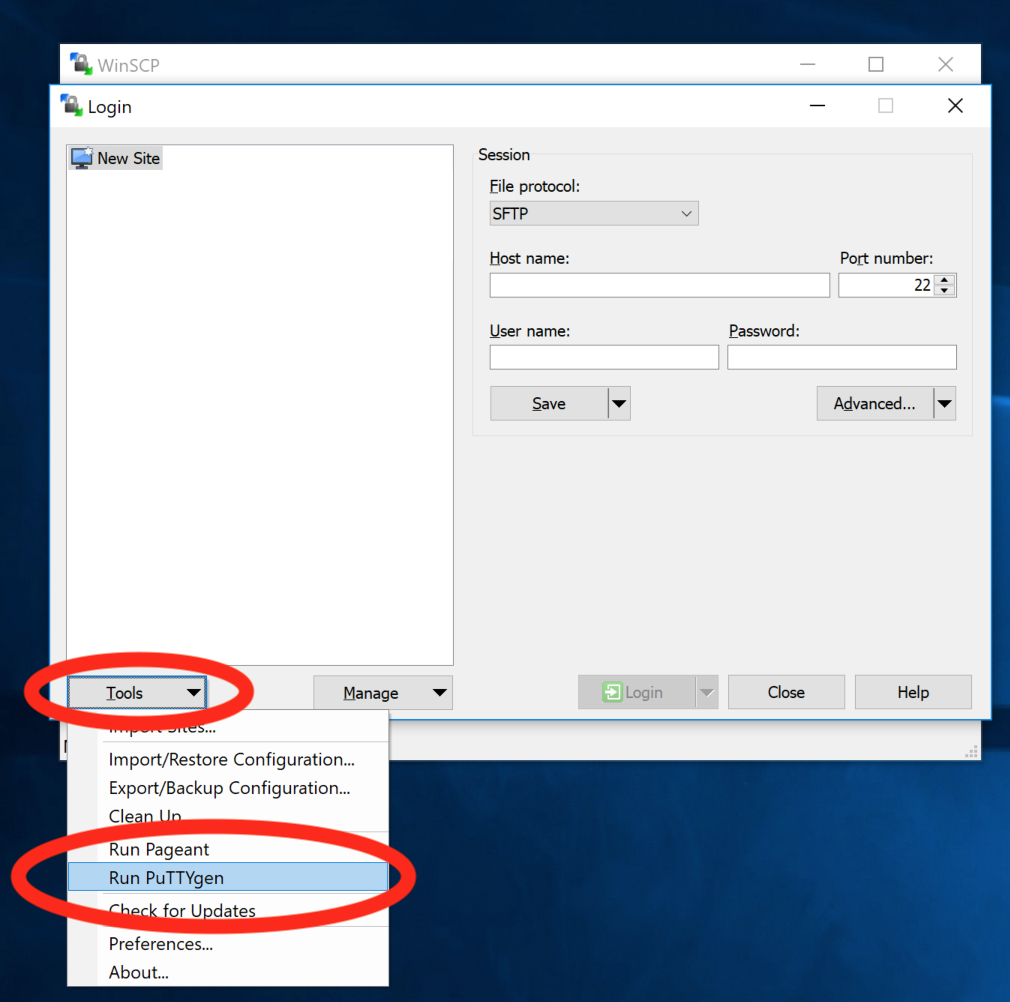
- Open WinSCP from the Windows Start Menu, click Tools and Run PuTTYgen:
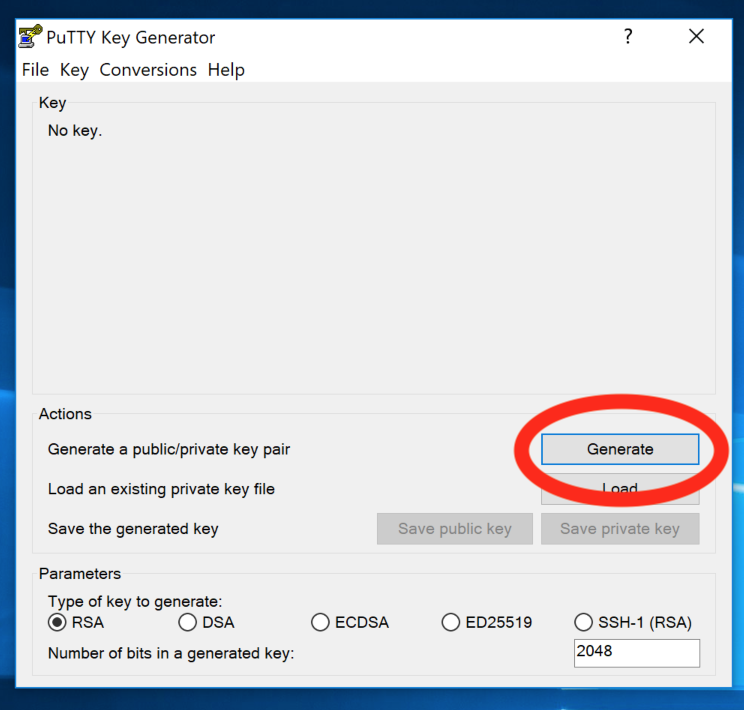
- In PuTTyGen, click Generate:
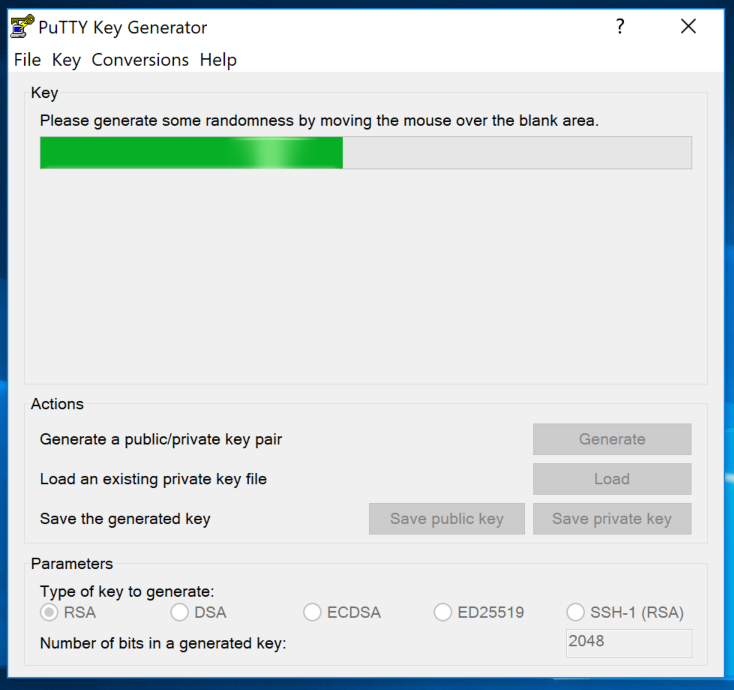
- Move the mouse around the PuTTyGen window to aide random number generation:
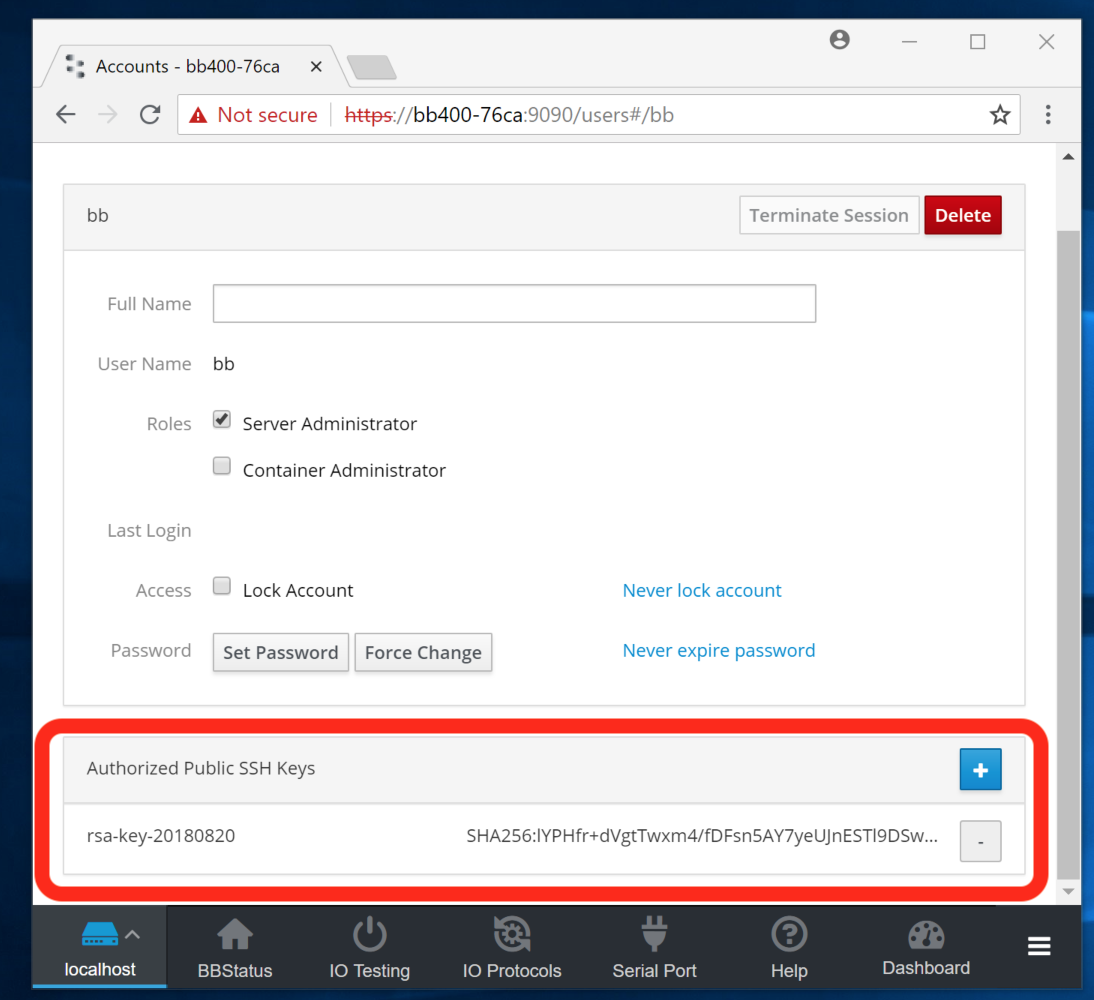
- A public and private SSH key pair has been generated in PuTTyGen. Copy the public key into your BB-400 by opening a web browser, logging into the BB-400 admin webpage, and accessing the
webpage>users>bbwebpage. Click the+button next to Authorized Public SSH Keys. Copy the public key from the highlighted section of PuTTYgen, and paste it into the highlighted section of BB-400 web admin, and clickAdd Key: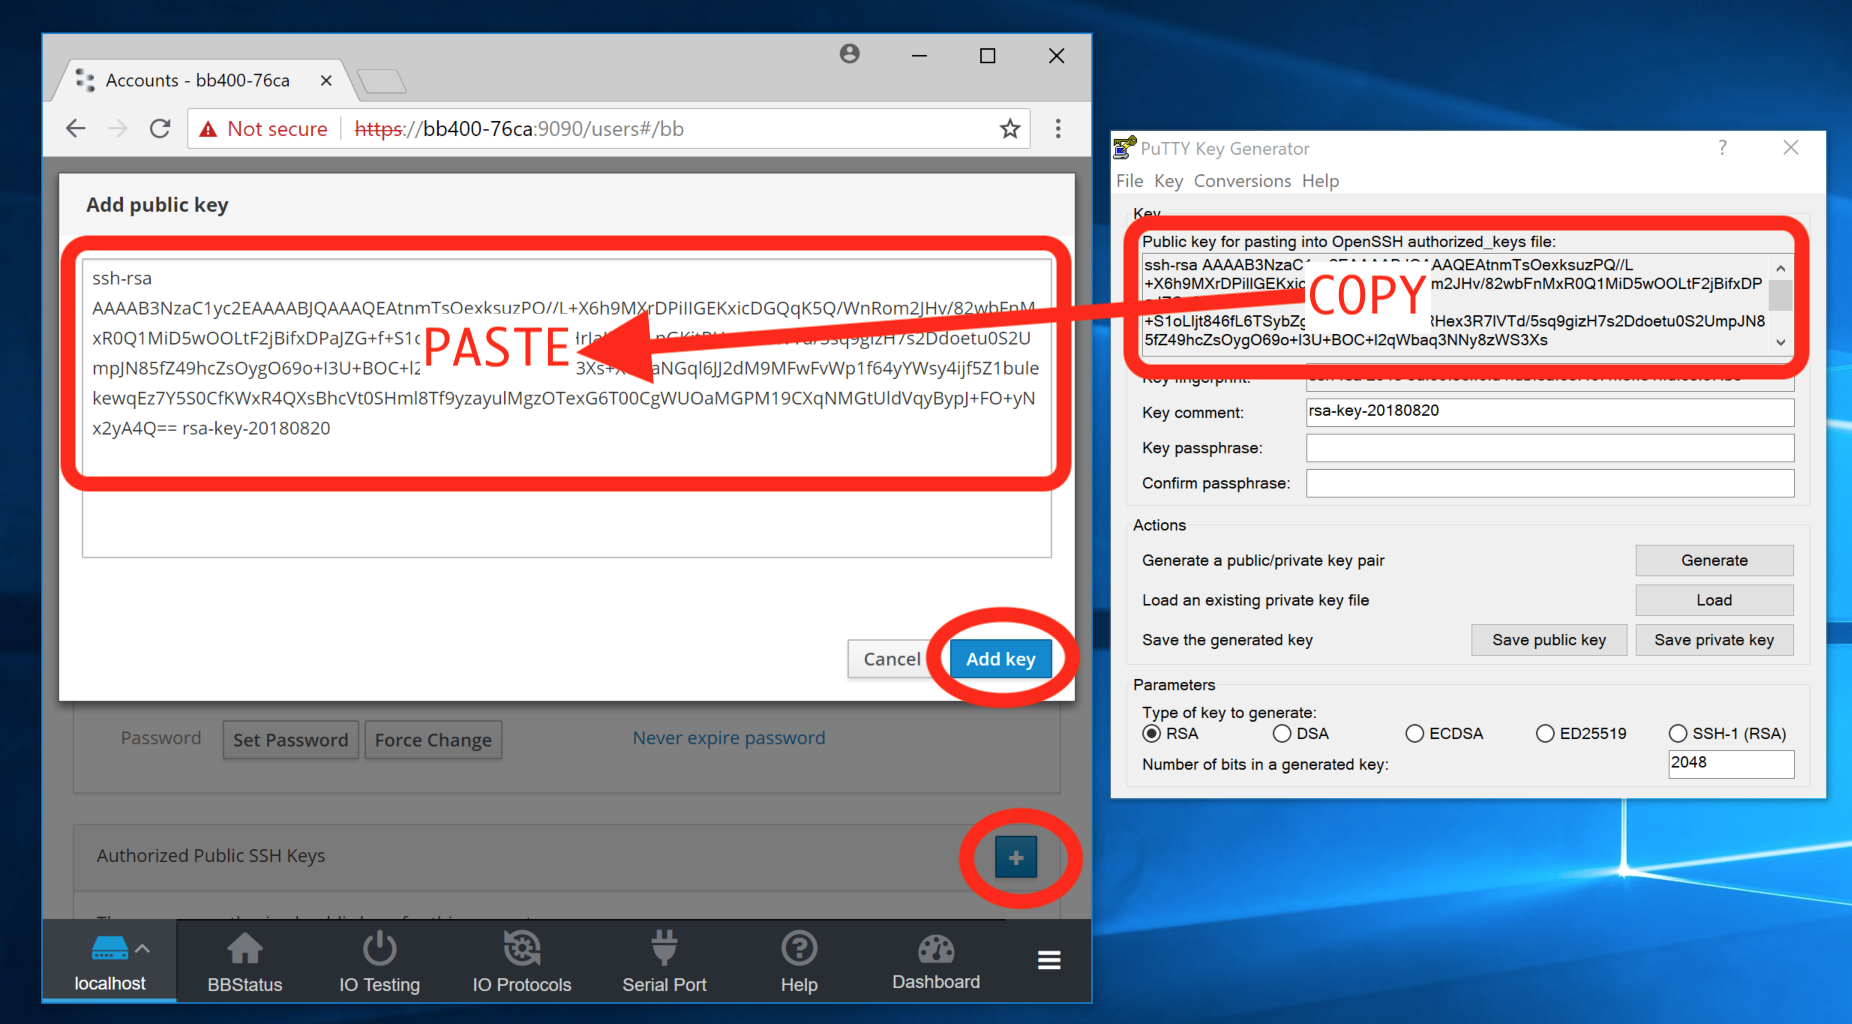
- Confirm the public key has been copied by reviewing it in the BB-400 web interface:
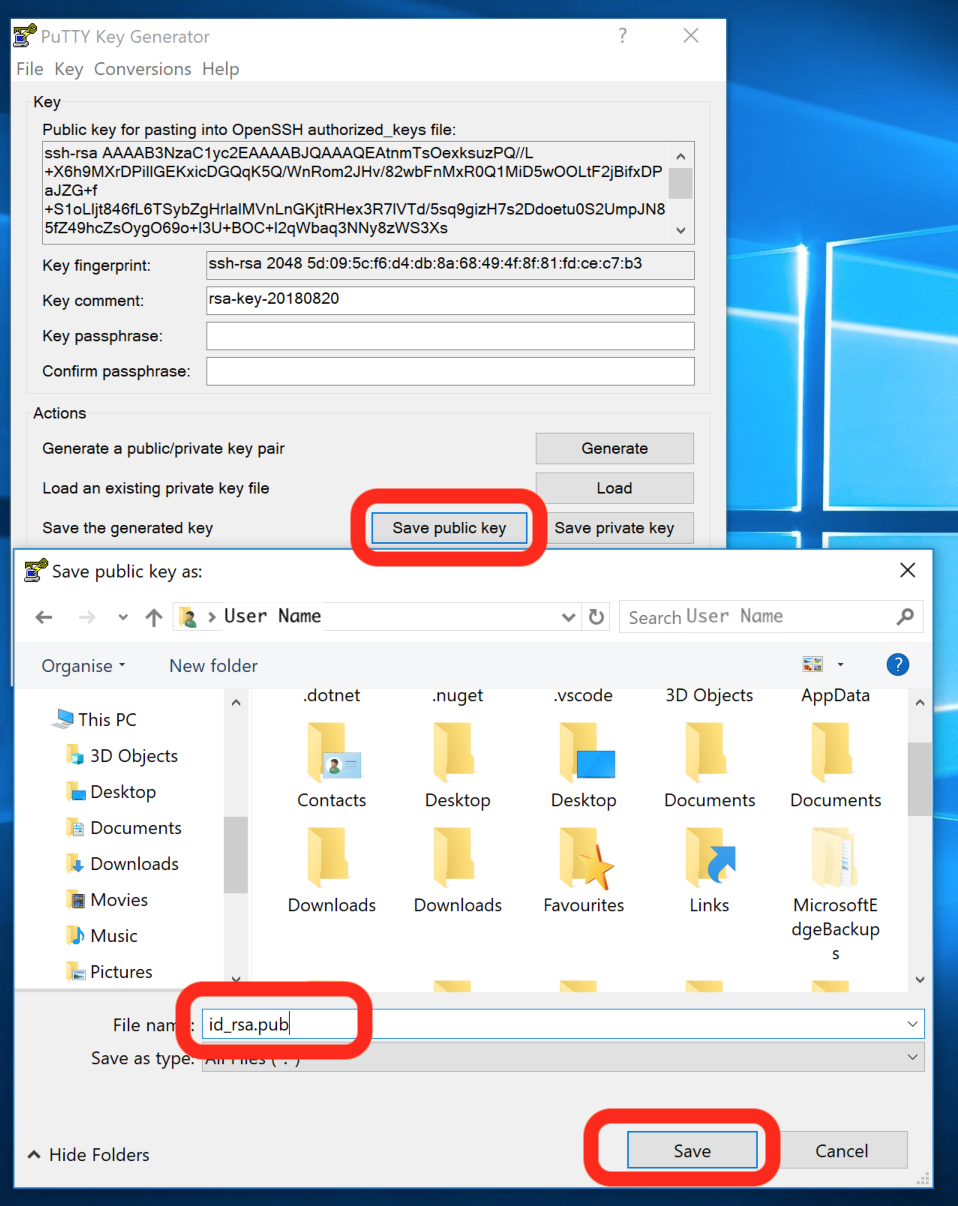
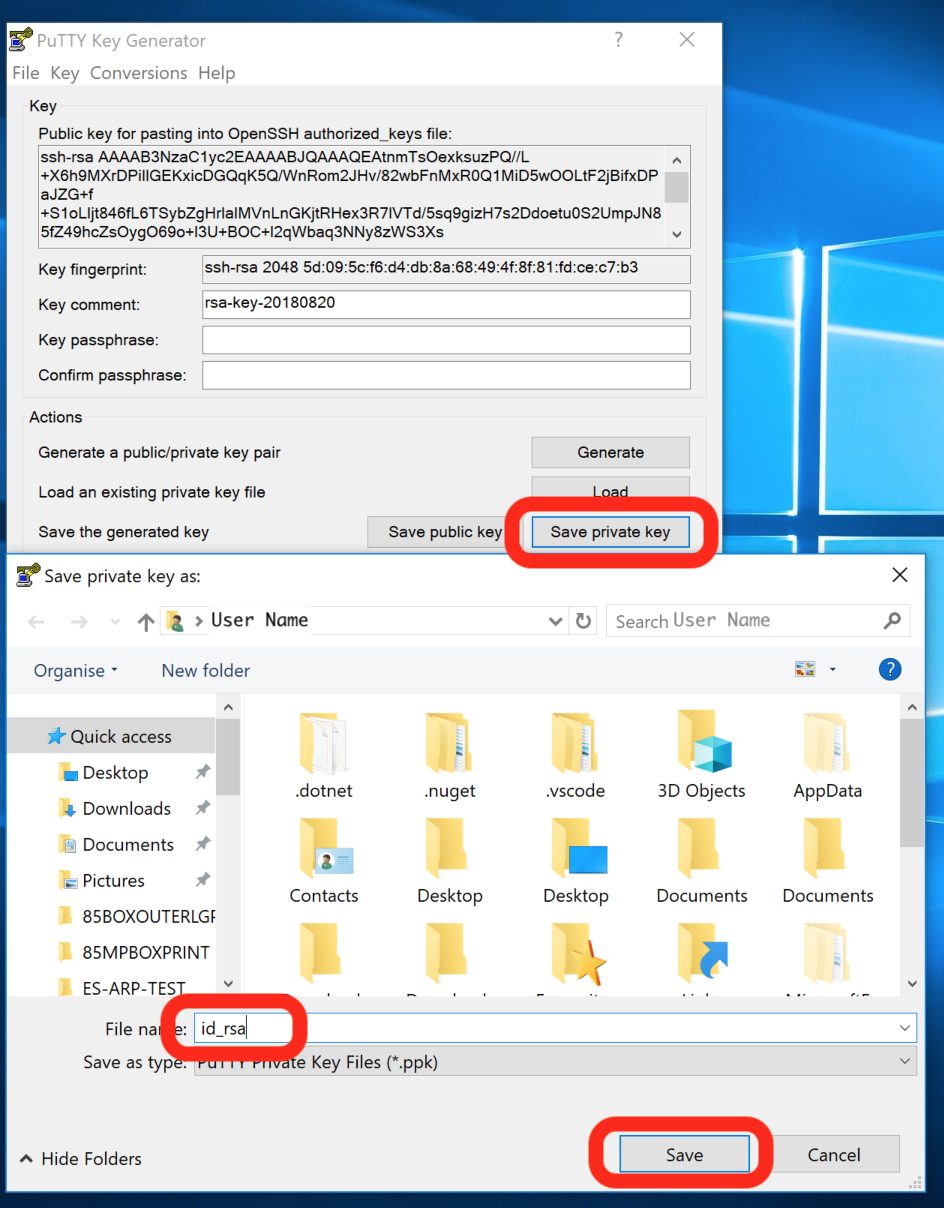
- From PuTTyGen save the public and private key to a local folder on the Windows machine:
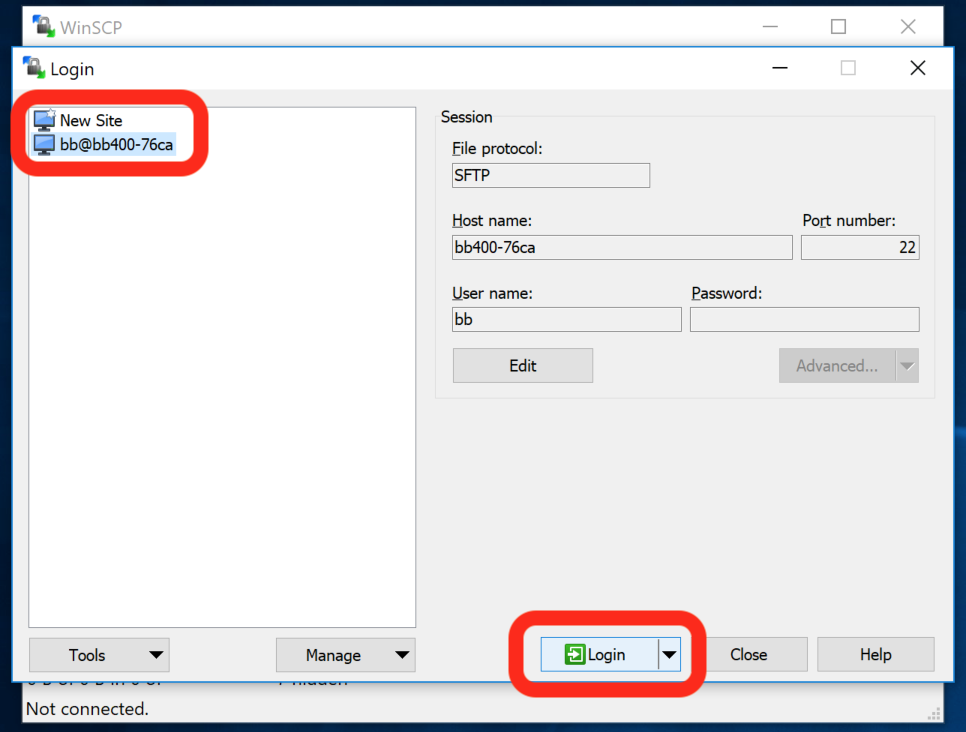
- Exit PuTTYgen. In WinSCP, add the BB-400 hostname and username. Click on
Advanced, thenSSH>Authenticationand put the path to the private key file in the box highlighted below: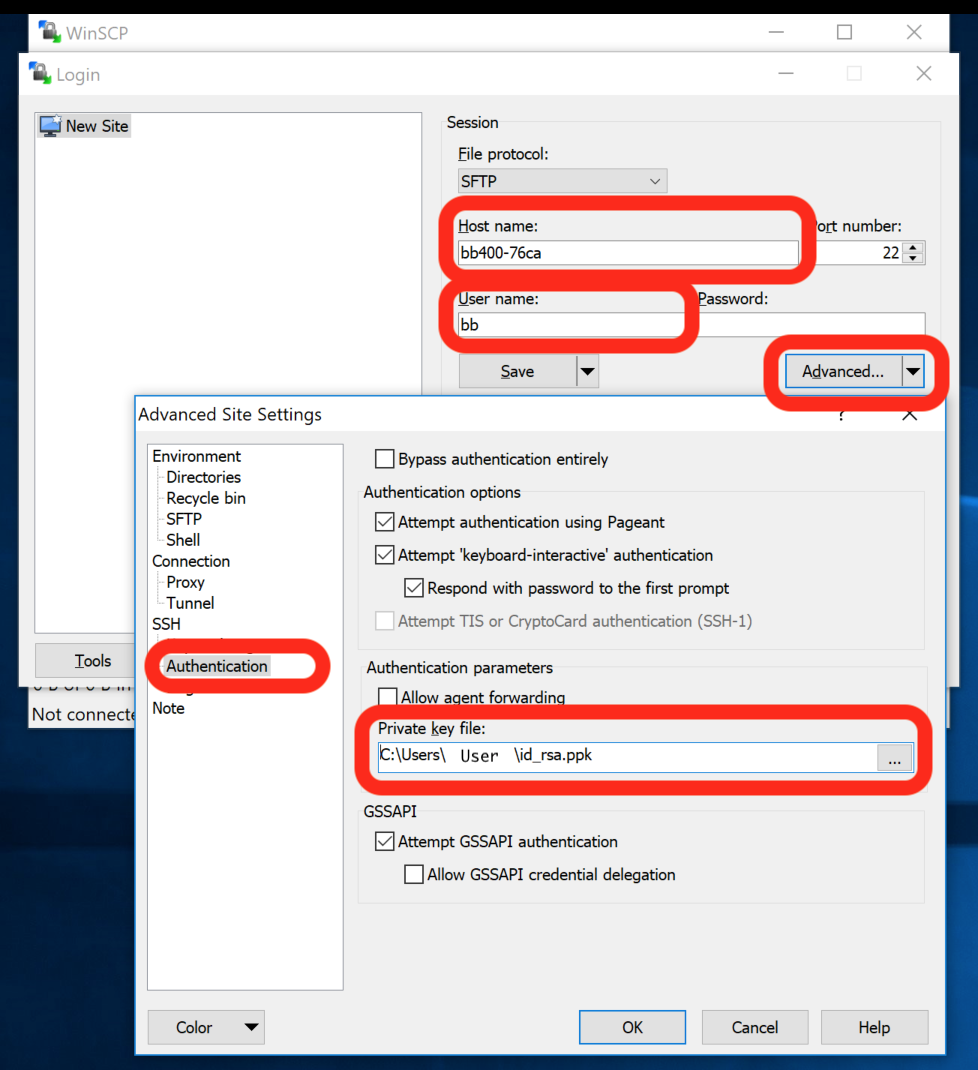
Exit Advanced and save the WinSCP site setup.
Use SSH keys in Windows to BB-400
- Login to the BB-400 using WinSCP with SSH-keys:
- WinSCP will open the connection to the BB-400, and from there, a terminal can be opened to the command line with PuTTY by clicking on the highlighted icon.

The set up is now complete! It is now possible to login to the BB-400 over SSH using WinSCP or PuTTY without a password. Other methods of SSH communication are available in Windows, for example by using PowerShell or Linux Subsystem for Windows.

 Connecting to BB-400 using SSH Keys on Mac OSX and Linux
This section will cover connecting to a BB-400 using Mac OSX and Linux. Both typically have SSH on their command lines without the need to install any additional software. The commands for both systems are the same, with one exception, on Mac OSX the suffix .local must be added to the hostname of the BB-400 for the device to be found on the network.
Setup SSH keys in Linux and Mac OSX
Open a terminal:
- In Mac OSX, go to: Applications > Utilities > Terminal.app
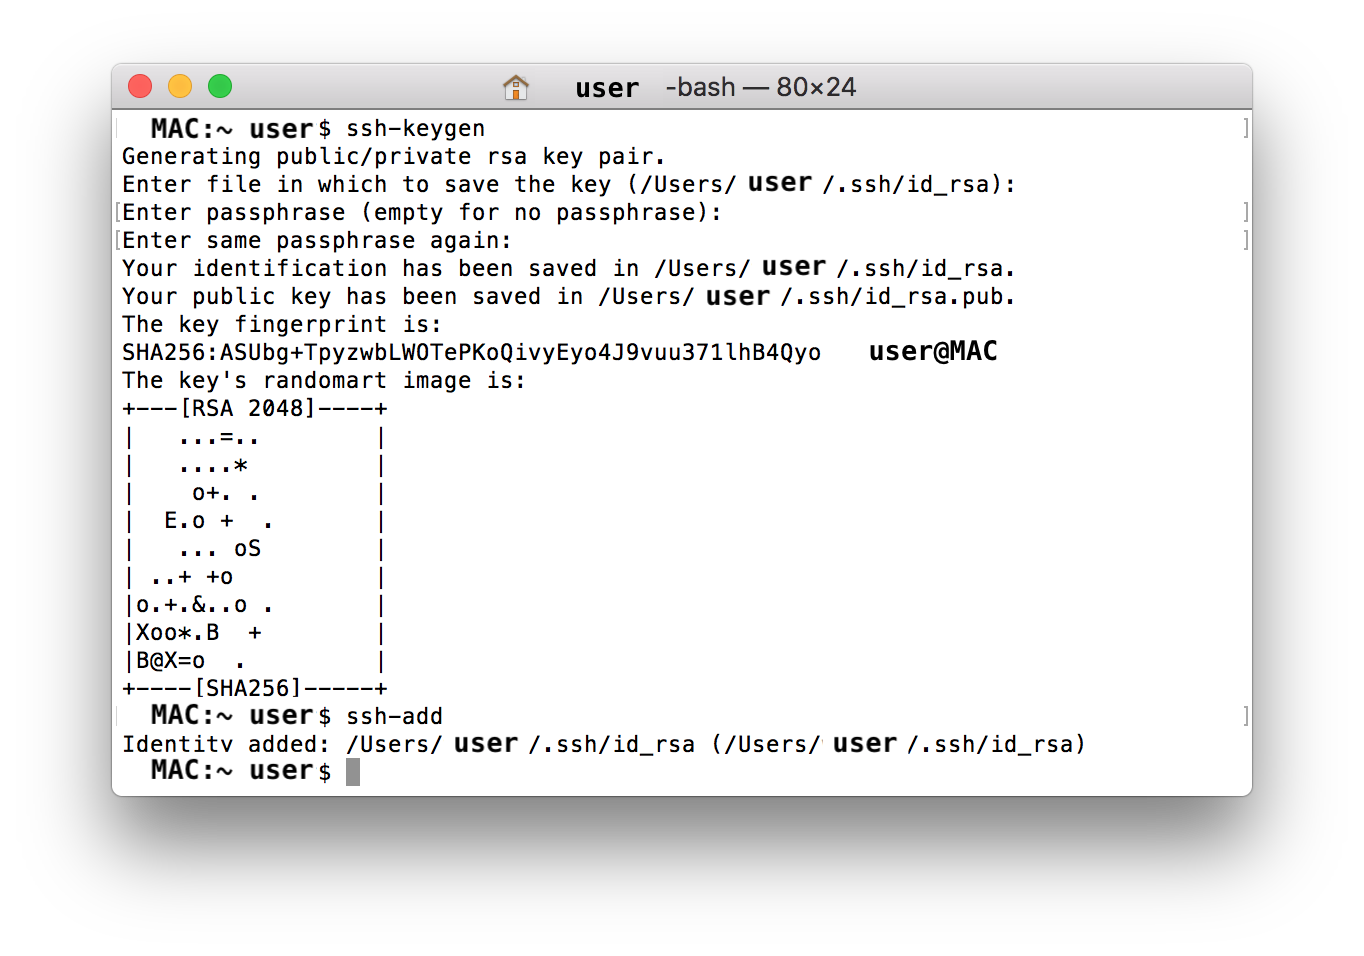
- In Linux, open your favourite terminal application. On the command line, type: ssh-keygen
| Linux | Mac OSX |
|---|---|
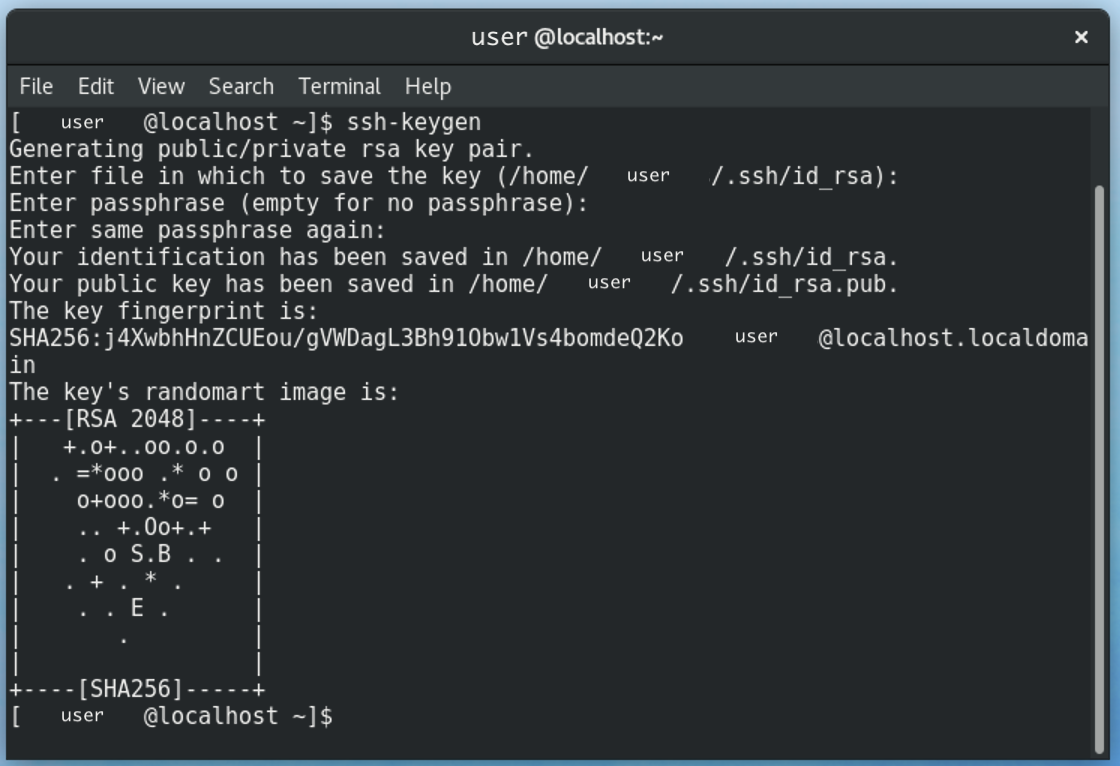 | 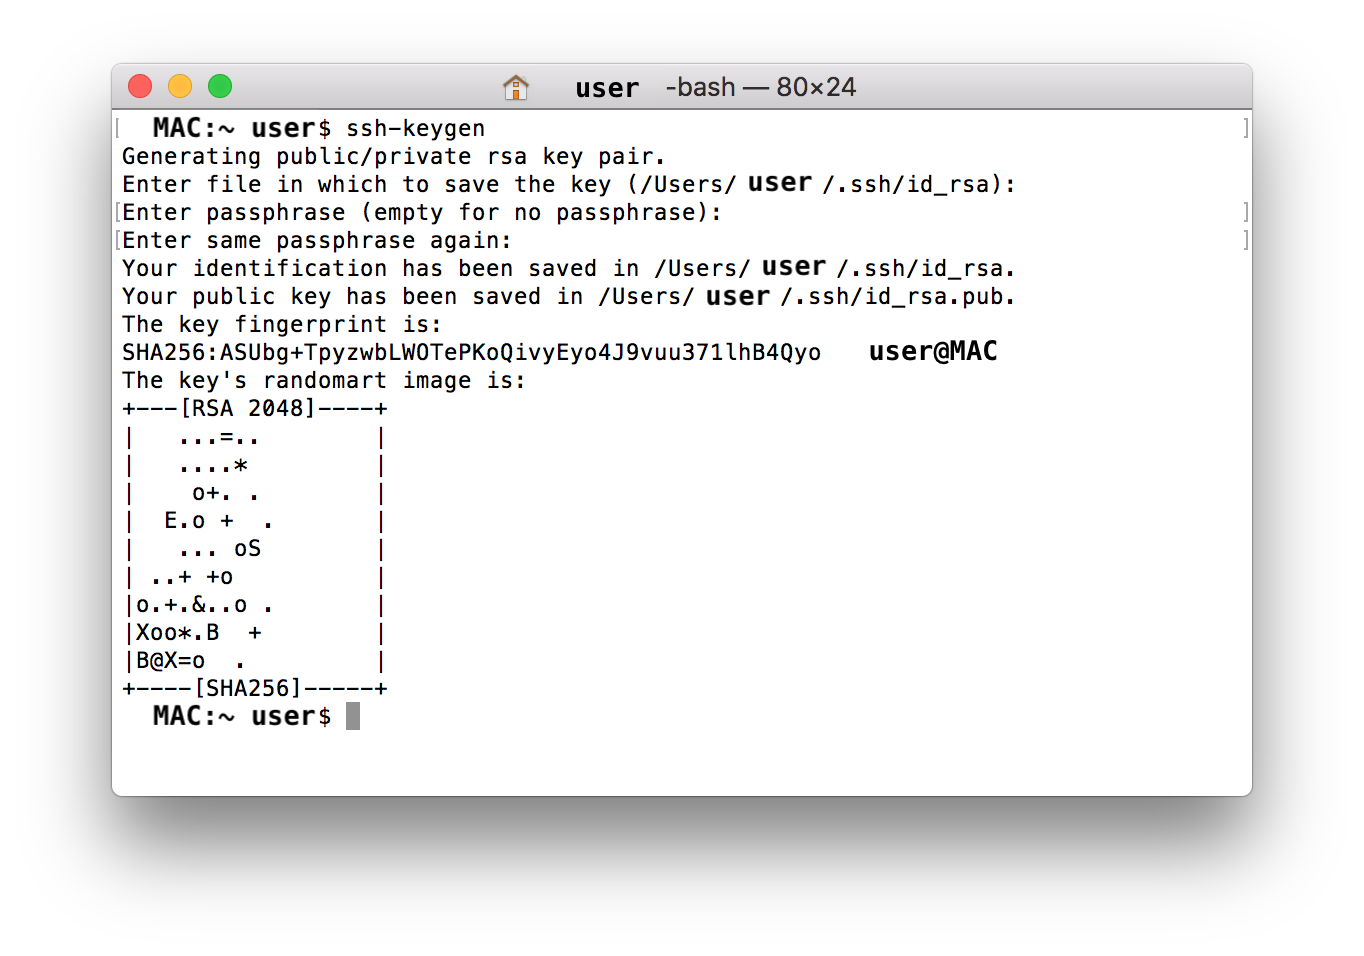 |
Agree to the default settings for the key generation, and if required, add a passphrase. A pair of SSH keys have now been generated and saved to their default location in your user folder:
| Linux | Mac OSX |
|---|---|
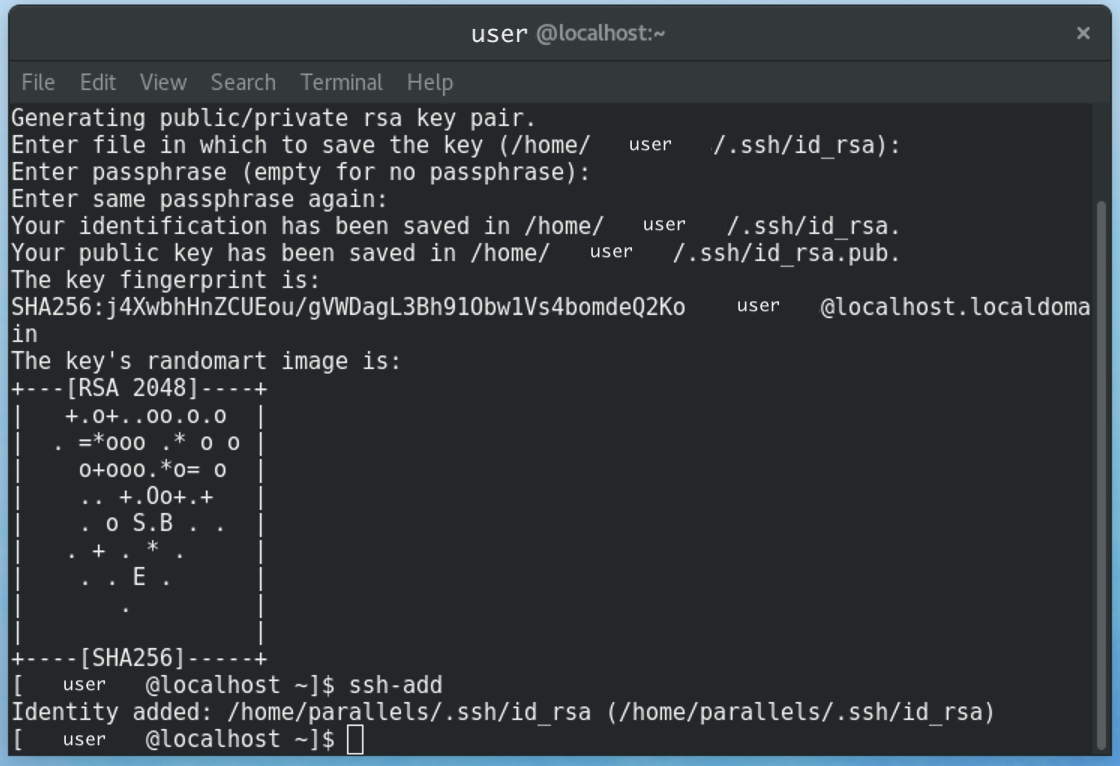 |  |
Type ssh-add to ensure the SSH keys have been added to your machine user identity:
| Linux | Mac OSX |
|---|---|
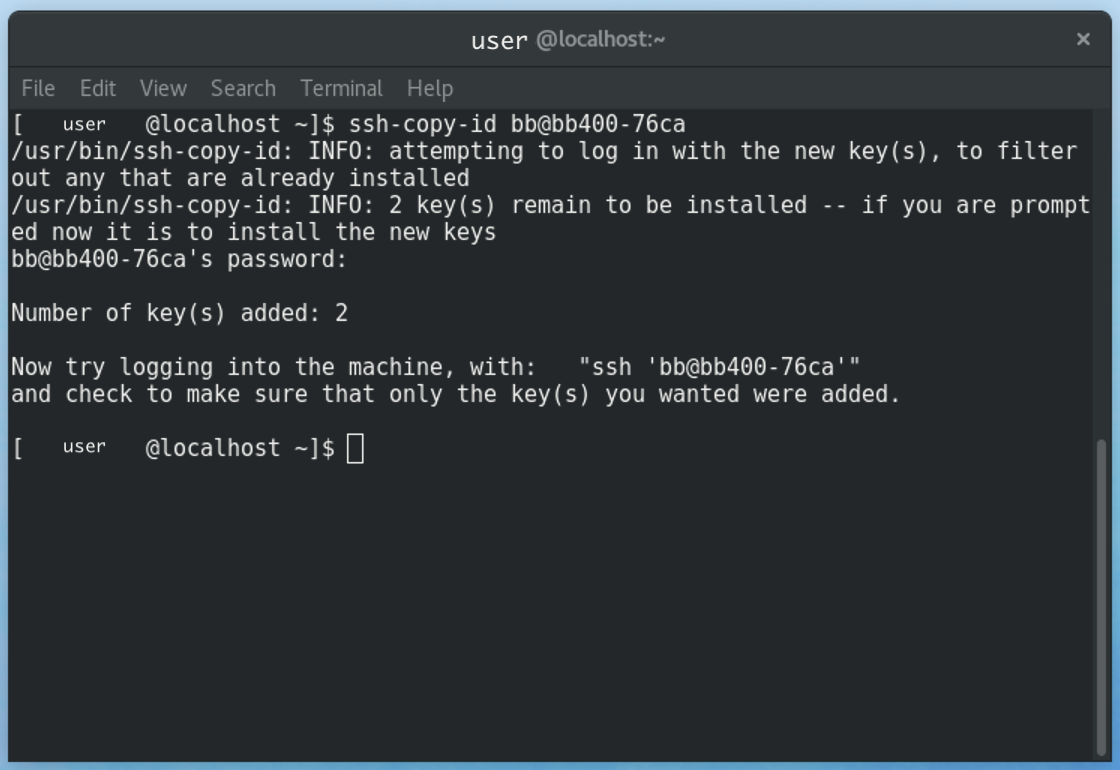 | 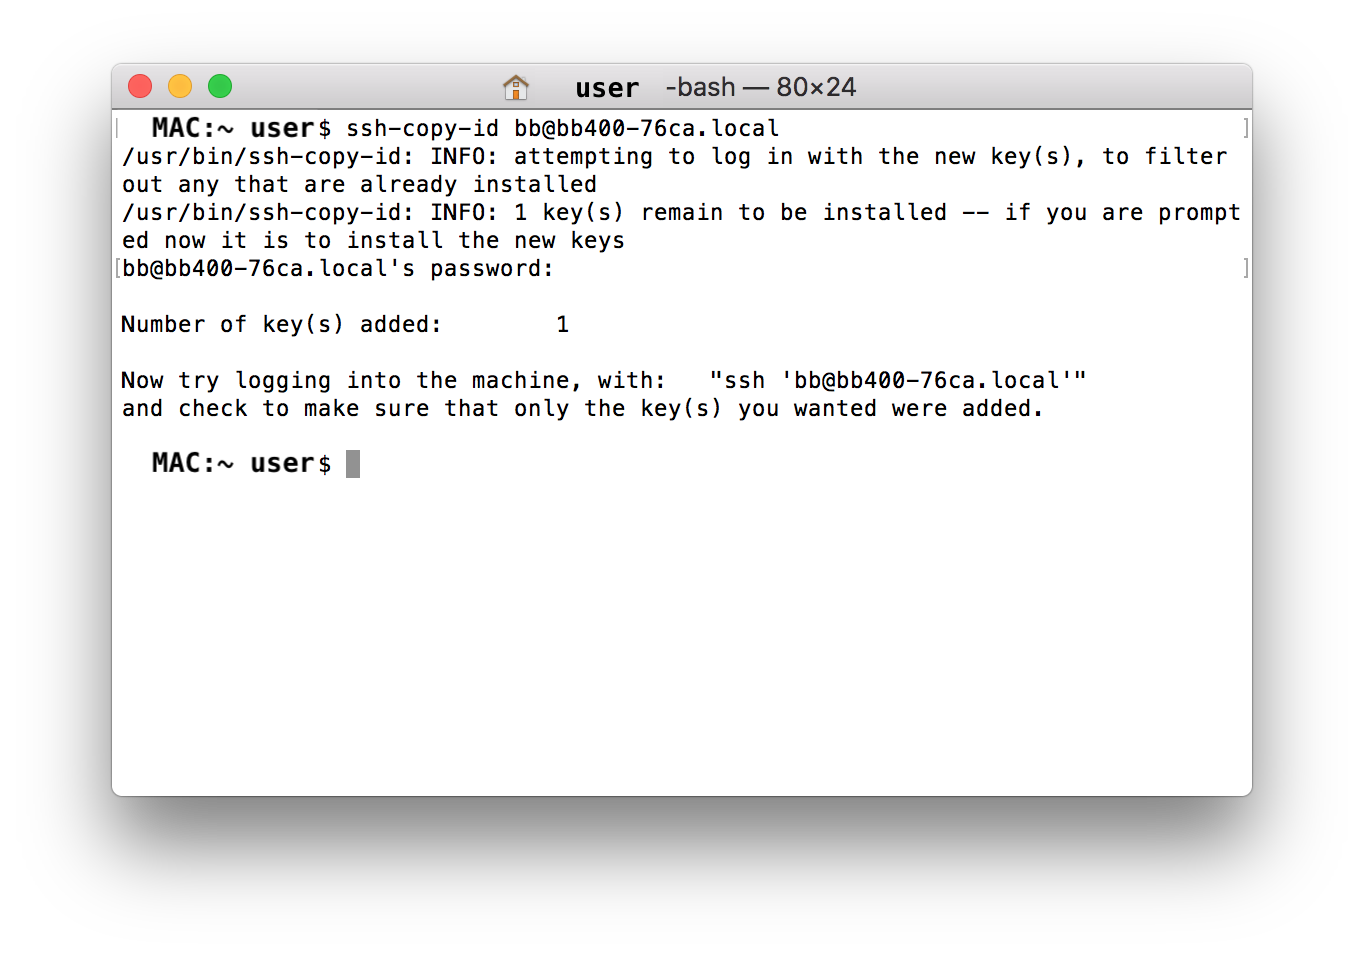 |
Copy the SSH public key over to the BB-400 by typing into the command line ssh-copy-id bb@bb400-aaaa (Where 'aaaa' represents the last 4 characters of the BB-400 Mac Address found on the back panel). The shell will ask for a password (as the key has not been copied yet).
Use SSH keys in Linux and Mac OSX
To test the setup type ssh bb@bb400-aaaa to initiate an SSH session with the BB-400:
| Linux | Mac OSX |
|---|---|
 |  |
The setup is now complete. The computer will always use SSH keys to login, and never request a password from now on.
This article has demonstrated how to set up and configure SSH keys in Windows, Linux and Mac OSX, allowing you to login to a BB-400 without the need to type in a password. This method is both more secure, and more convenient. It also allows command line applications to be scripted that automatically login to a BB-400 to complete a task, e.g. updating with the latest software over a local network.
In high risk environments it may be good practice to disable the typed-in password and only allow SSH keys for login. However the trade off is the key must be kept securely, and possibly backed up, so there is reduced risk of losing access to the device.