PX Windows 8 Installation
Installation Steps
-
Insert the PX CD into your laptop.
-
Insert the PX card into an available ExpressCard slot on your laptop.
-
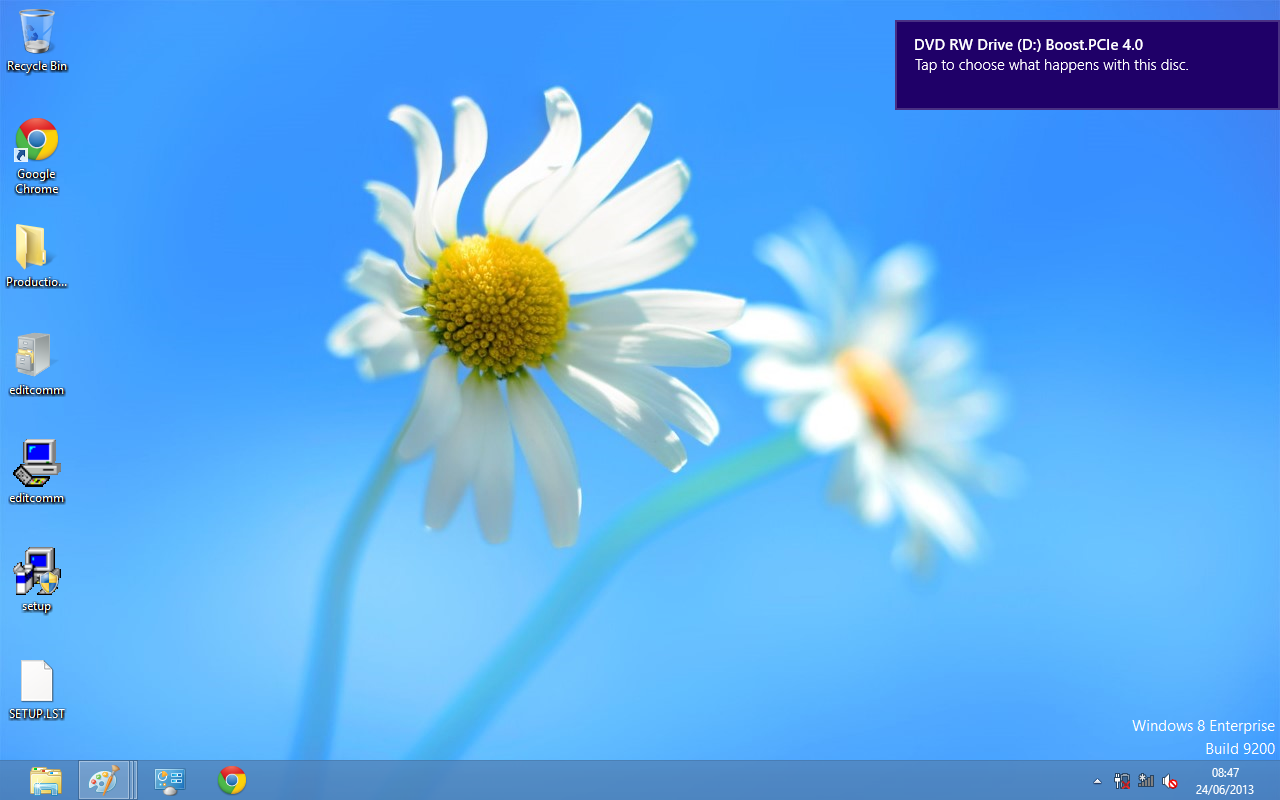
You will now see the below window appear. Click on it and a menu will appear.
-
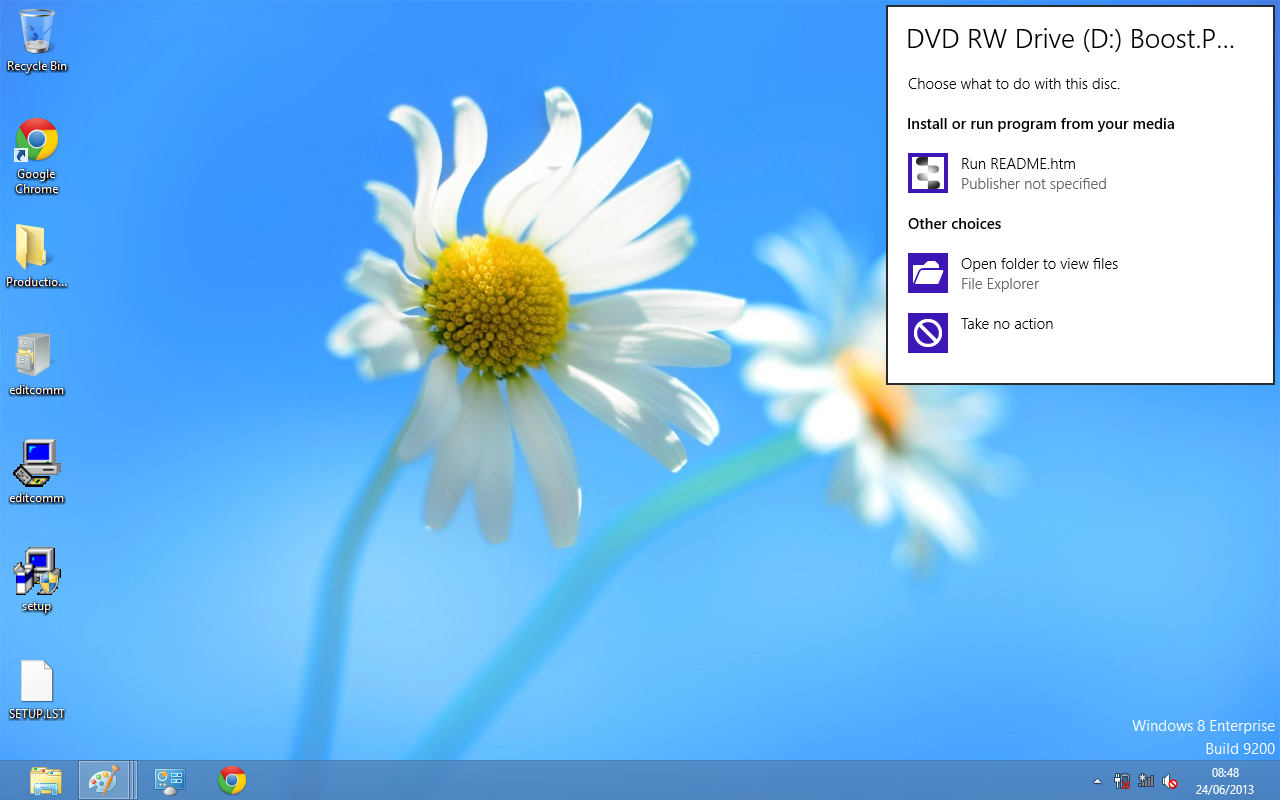
Now select the "Open folder to view files" option from the below window:
-
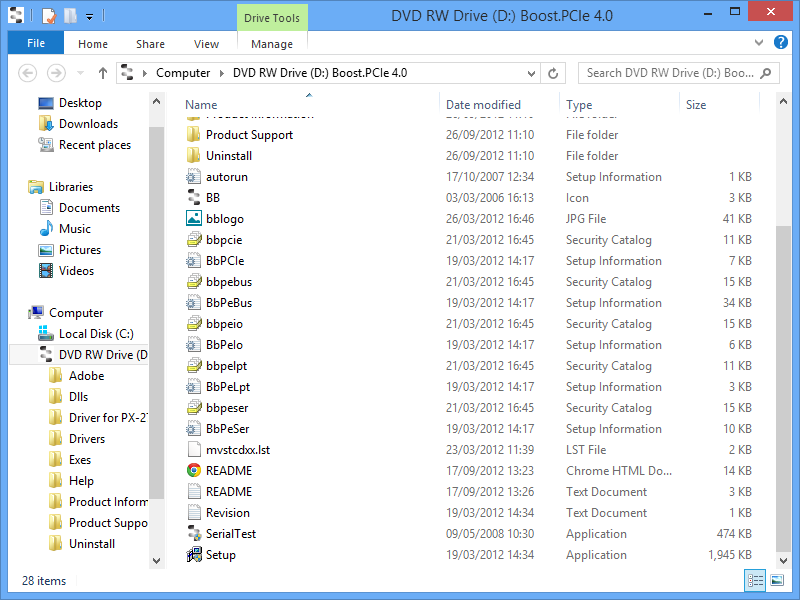
Go to the bottom of the list of files and select the setup.exe file. This file will install the PX drivers.
-
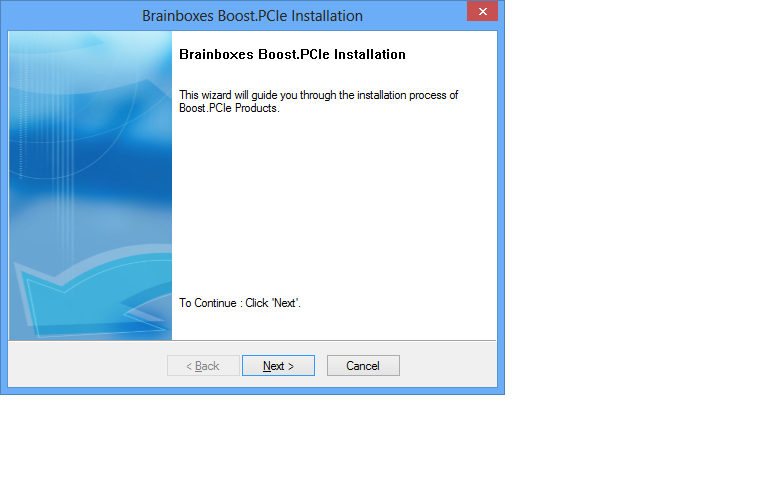
Now that you have selected the setup.exe file, you will now see a window as shown below, click Next.
-
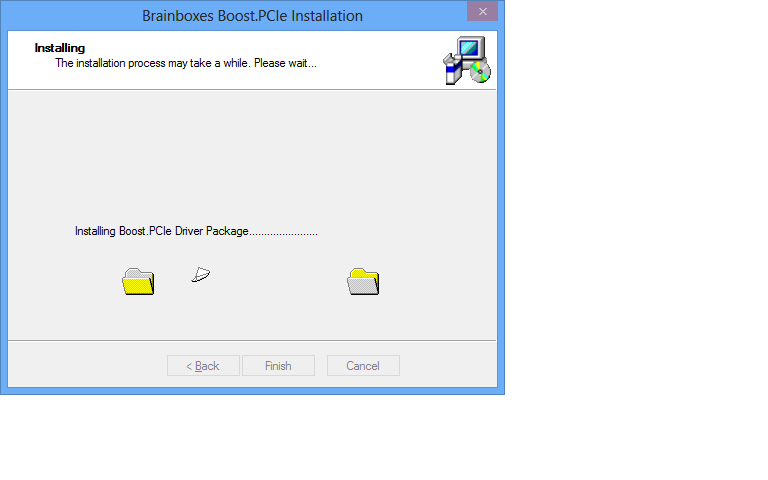
When the drivers are installing, the window will look like the one below.
-
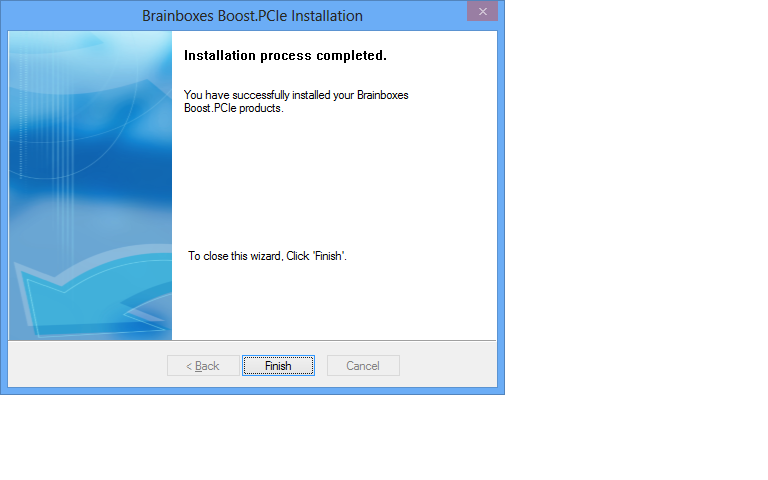
When the drivers have been installed, you will then see a similar window as shown.
-
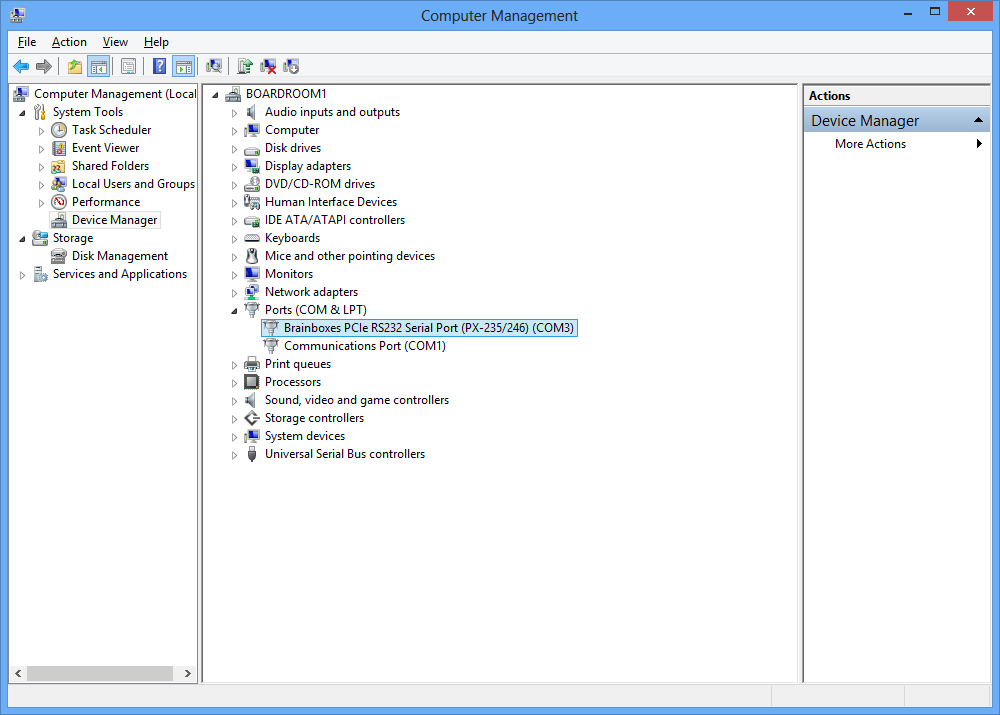
When the drivers have installed, Device Manager will now look like the below image. If there are any yellow exclamation marks over the Brainboxes products, please right click the device and then update the driver pointing to the files on the CD-ROM.