
PX Windows XP and Server 2003 Installation
Windows XP and Windows Server 2003 Installation
Images below show a PX-260 4 Port RS-232 device as an example. The same installation steps can be applied to all other products in the PCI Express range.
Installation Steps
-
Turn off the PC (unplug from power socket) and insert the PCI Express Card into a free PCIe slot.
-
Turn the PC on.
-
Insert the Boost.PCIe CD.
-
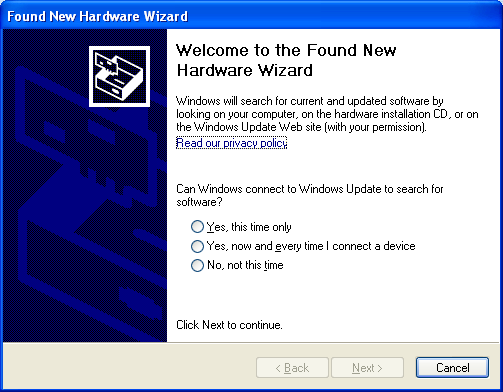
If you would like to install via Windows Update, select "Yes, this time only". Otherwise Select "No, not this time" to install from the CD and click Next.
-
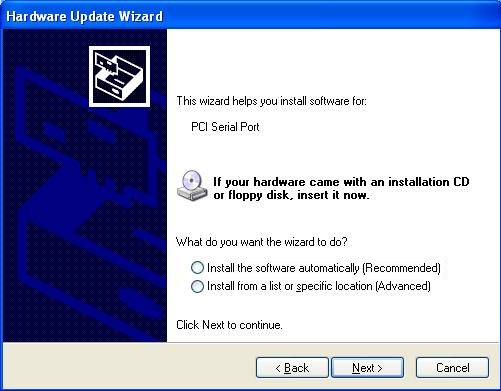
The Found New Hardware Wizard will then ask you to locate the software drivers.
If you have chosen to search Windows Update, select "Install the software automatically (Recommended)". This will take you to Step 7.
If you wish to install from the Boost.PCIe CD, select "Install from a list or specific location (Advanced)" and click Next to point to the CD drive.
-
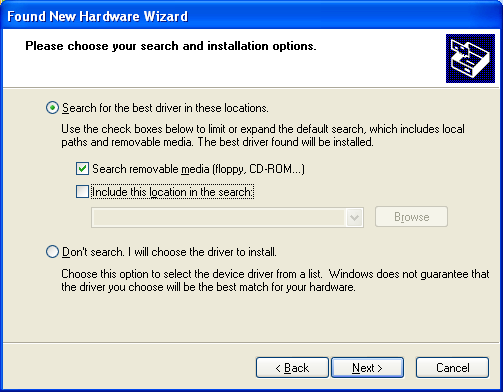
Select to "Search for the best driver in these locations" and then "Search removable media", as shown below. Click Next.
-
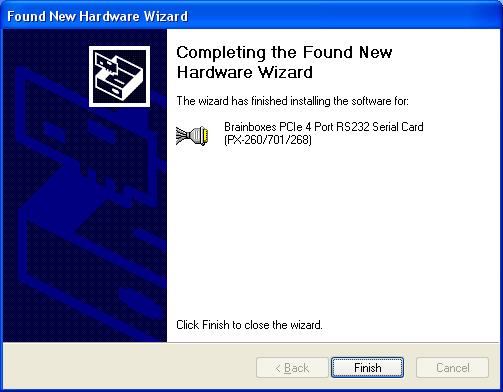
The Installer will copy across all the drivers and associated registry files. Click Finish when complete.
-
If you are installing a multiport card, you will need to install each port manually following steps 4-7 when prompted for each port on your card.
-
If you are installing a 422/485 card, you will also need to install the "Base System Device". This is the 422/485 Controller for your card. Follow steps 4-7 again when prompted.
-
Once installed, you can check the COM Number of the Port, by opening Device Manager (See Finding your Brainboxes COM port). If you need to change the COM port number, see Changing Your COM Label.