
US Finding COM Port
Finding your Brainboxes COM Port
-
Open Device Manager (Found by Right Clicking on My Computer and clicking Manage. Then Select Device Manager from the left hand pane.)
-
Find the Brainboxes Serial Port entry in Device Manager. (Found under the 'Ports' section)
-
The Brainboxes Serial Port entry displays the current COM number in brackets after the name. (This is usually COM3 following install, but may be different if other serial devices have been installed in the past)
-
To change your COM label, see Changing your COM label

Port Settings
The Port Settings allow you to set Default or Override Settings for the serial communication and how to deal with incoming hardware handshaking events.
-
To open 'Port Settings', open device manager and Double Click on the Brainboxes COM Port Entry under the 'Ports' section
-
Then Click on the 'Port Settings' tab.
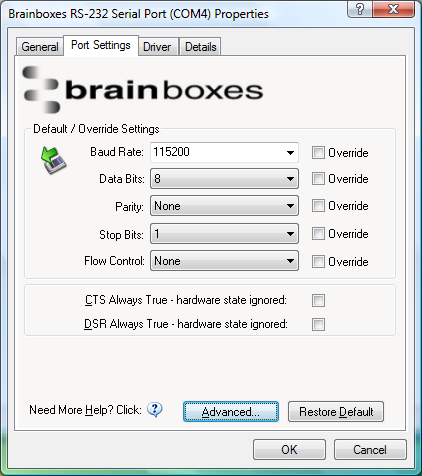
All options can be selected from the Dropdown Menus. In addition, you can enter a non-standard value into the Baud rate.
Once the desired settings have been achieved, you must click OK to activate them. At any time click the 'Restore Default' button to return to the original setup.
Default / Override Settings
Default Settings will be set if an application does not specify the serial settings when it opens the COM Port.
- This is sometimes the case with old Legacy applications and you will need to choose these settings to match the communications that you wish to use.
- The majority of Applications will specify what Serial Settings they wish to use. In this case, it will not matter what the Default settings are, as the Port will be opened with the Application's Settings.
When the 'Override' box is checked next to the Default Setting, the Port will communicate at this setting whether an application has requested it or not.
- For example, this will enable you to force baud rates that your application does not allow you to select. This can be useful for interfacing to equipment which uses higher baud rates or unusual baud rates, which your application does not support.
- In a case where you want to use hardware handshaking, but your application is not capable, you can select RTS / CTS Always True -- Hardware state ignored and choose to Override it.
With the use of Override Settings, you need to ensure that the equipment you are connecting to is setup to match the communications settings you are forcing.
CTS / DSR Always True
CTS and DSR are incoming hardware handshaking lines. This means they receive signals from the connected device which tell the US Card when it is and isn't OK to send data.
- Sometimes these signals may want to be ignored. By forcing CTS or DSR True, the US Card will ignore those signals and always send data.
- These settings are especially helpful when CTS and DSR are not physically connected (such as in a 3 wire setup) and it is not acceptable for the data flow to stop and start due to arbitrary variances on the unconnected signal lines.
Changing your COM Label
-
If you need to change the COM label, Double click on the Port entry in Device Manager
-
Click on the 'Port Settings' tab and click Advanced

- A new COM Port label can be selected from the dropdown menu. Click OK to set the new COM Label.
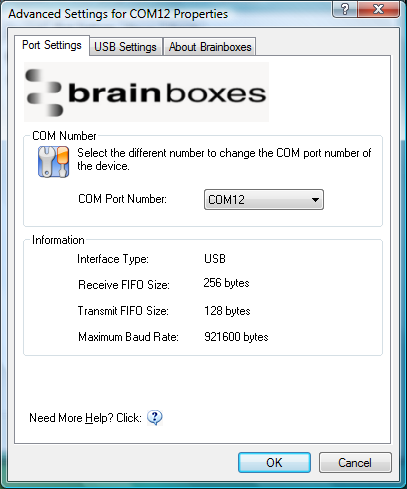
If the COM Port number is labelled "in use", it is either currently used by a COM Port present on the system, or is reserved for a device which is not currently present. It is possible to select this COM number and force the change, if you are sure it is not required by any other device.